
About links
Links are an essential part of the web, so learning about them is a must. They look complicated at first, but with a little familiarity they're easy to learn.
A link opens another file, either another page on your site or another website. The file can be of any type the browser can display, not just another HTML file. For example, the link can lead to an image or a PDF document.
The 'clickable' part of the link can be just about any element on the page, but usually it's a short piece of text or an image.
Opening and closing tags
Links in HTML take the form of an opening <a> and closing </a> tag on either side of some text or an image. That text or image becomes clickable, and when clicked it opens another file. This is shown in the incomplete code below:
<a> </a> (clickable text or image goes between these tags)
To make it complete we need to add an 'href' attribute to the opening tag.
'href' attribute
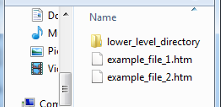
The 'href' attribute contains the URL (i.e. address) of the file to be opened. If it leads to a file on your site (such as another page or an image), the URL will simply be the file path to the file. If it leads to another website, the address will be the 'absolute' URL (i.e. http://www etc) of the linked site.
<a href="file path or URL">		    </a>
<a href="../images/mid_level.png">	    </a> (image on this site)
<a href="lesson_21.htm">	    	    </a> (another page on this site)
<a href="http://www.shopcat.com/">	    </a> (another website)
Opening the link in a new tab
You may want a link to open in a new tab. To do this add target="blank" to the opening tag. This is often used when linking to an another website
<a href="http://www.bootiebike.com/" target="blank"> </a> (opens in new tab)
Link to the page as you normally would (as described on this page), and then take the following two steps:
- Make sure an element (e.g. heading or paragraph) at the desired location has an ID. Add one if necessary.
- In the origin page, append a hash/pound (#) sign and the ID name to the end of the file path in the link. If it's on the same page, just use the pound sign and ID name.
Example
The link in the first dot point above links to the 'Giving an element a class or ID name' heading in Lesson 12. Did you notice that the page opened at that heading? I gave that (heading) element the ID of 'givename', and linked to it as described here. You will be able to see 'lesson_12.htm#givename' in the address bar.
<a href="lesson_12.htm#givename">		</a>		(The link)

<h2 class="subheading" id="givename">		</h2>		(The ID on the target page)
Layout of pseudo-classes
Here you can see how pseudoclasses are laid out – you can see that they are just like the rulesets you've already learnt about, but the selector is a bit different. This is explained in the next section.
a:link {   		  	 	/* unvisited link */
  property:value;
  property:value;
  }

a:visited { 	  	   		/* visited link */
  property: value;
  property:value;
  }

a:hover {			        /* mouse hovered over link */
  property:value;
  property:value;
  }
Selectors for pseudo-classes
Below you will see how pseudoclasses are commonly used with links. The pseudoclass selector comprises three parts:
- a
- Selects all links (selects by element type; 'a' = link element)
- :
- Indicates that the link will be selected when it is in a specified state
- link, visited or hover
- The three possible states: Links that have not been visited, those that have been visited, and one with the cursor hovered over it.
Specifying the link styling
Here are rulesets for three link 'states'. They specify the colour for each state. You will notice that the rulesets have been 'flattened' by putting each on a single line. Don't worry, it's all the same – just a cosmetic change – they are often laid out this way.
a:link {color:indigo;}      	 	/* unvisited link */
a:visited {color:steelblue;}      	/* visited link */
a:hover {color:fuchsia;}    	 	/* mouse over link */